DIY Garden Shed Plans: How to Choose Size & Plan Your Build
Botanical Horticulturist & Food Preservation Specialist at Brittle Bloom · Certified Master Gardener & Master Food Preserver · 12+ Years in Plant Propagation & Food Preservation
You've got a garage full of tools, a lawn mower shoved behind the car, and garden stuff stacked in every corner. If you're searching for diy garden shed building plans choose your size and plan your build, the smartest move is to measure before you draw. Size isn't about using up empty space.
It's about fitting your life.
Here's a baseline to anchor your thinking: many U.S. jurisdictions skip permit requirements for sheds under 120 square feet. Some cap it at 100, a few let you go to 200. As of 2026, the International Residential Code gives you the framing standards that most local codes adopt.
So your first homework is a phone call to the building department.
Start Here: How to Choose the Right Shed Size Without Guessing
Choose a shed size based on three inputs: what you store, what your yard allows, and what your skill level can handle. Add at least 25% extra floor area for walking space. An 8×10 shed is a practical minimum for a mower, a workbench, and hand tools.
A 10×12 gives you comfortable room to move.
This decision tree works because every build is a trade-off. Bigger costs more lumber, takes longer, and eats more yard. Too-small is worse.
You will hate shoving a wheelbarrow past a workbench every single time.
Use if/then logic to narrow your options. If you only need to store garden tools and a hose, a 6×8 is fine. If you own a riding mower, jump to a 10×12 or larger.
If you want a mini workshop, plan for a 12×16 with a proper door. When you shop plans, look for exact lumber quantities, cut lists, and a foundation plan that matches your site. A vague "build vaguely like this" plan isn't a plan, it's a puzzle.
Map Your Storage: What You're Really Putting Inside
Before you download a single plan, take inventory. Walk through your garage, shed, and basement. List every item that needs a home.
This list drives the size, not what looks nice in a photo.
- Ride-on mower: 48 to 60 inches long
- Push mower: 30 to 40 inches wide
- Wheelbarrow: 48 to 60 inches long, 20 inches wide
- Adult bike: about 6 feet long when stored flat
- Garden tools: rakes and shovels need 6 feet of lean space
- Trash bins: 40 to 45 inches tall
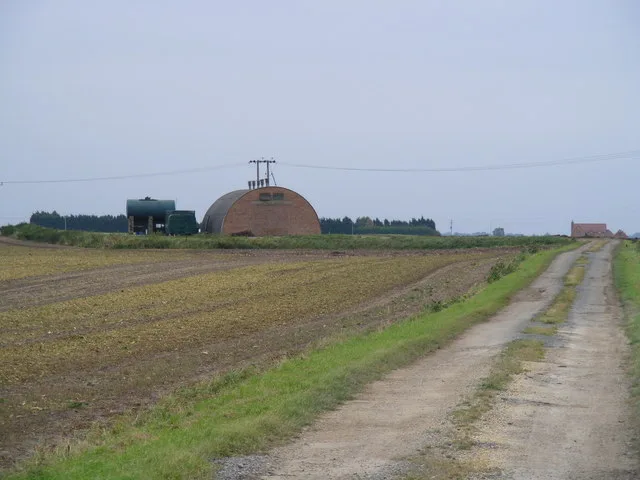
Image source: Wikimedia Commons / David Sands (CC BY-SA)
Measure the tallest and widest item, then add two feet of clearance around it. That turns your list into a practical width and length. Don't forget vertical space.
Wall hooks and shelving double your usable area, especially in an 8-foot-tall shed.
A good rule of thumb: if you think you need 8×10, plan for 10×10. The extra space costs less than the regret. And no, you won't grow into a bigger shed.
You will fill whatever you build.
Measure Your Property: Setbacks, Drainage, and Available Space
Your shed has to fit the ground it stands on. That means measuring the exact spot, not eyeballing it. Start by pacing out the area and checking setbacks from property lines.
Most jurisdictions require sheds to sit 5 to 15 feet away from the boundary line. Easements for buried cables and pipes stay clear too. Check your local zoning ordinance, which is often published by your city or county.
As of 2026, most places follow the International Residential Code for framing, but setbacks vary wildly. The International Code Council publishes the International Residential Code that many municipalities adopt.
Image source: Wikimedia Commons / Pearson Scott Foresman
Drainage matters just as much. Water should flow away from the shed floor, not toward it. Walk the site after a rain and see where puddles form.
If water pools where the foundation goes, you're picking the wrong spot.
Also check access. A 6-foot-wide path to the site saves you from bumping a sheet of plywood into your fence. And if you're building bigger than 10×10, make sure a truck can deliver lumber nearby.
Carry distance adds up fast.
Match the Plan to Your Skill Level: Foundation Types, Roof Styles, and Framing
Not all shed plans are equal. A small skillion roof on a gravel pad is a weekend project. A hip roof on a concrete slab takes two weeks and a level of patience you may not have yet.
Foundation type decides everything else. The three common options:
- Gravel pad over skid foundation: cheapest, easiest, perfect for level ground
- Pier blocks: good for slightly uneven yards, keeps wood off the ground
- Concrete slab: permanent, expensive, requires form work and pouring
Image source: Wikimedia Commons / Internet Archive Book Images
Roof style is your second big choice. Gable roofs shed rain well and offer attic space. Skillion roofs are simple, cheaper, and easier for beginners.
Hip roofs look great but add complex cuts at every corner.
For your first build, pick a plan with basic framing: 2×4 studs at 16 inches on center and a simple truss design. Pressure-treated lumber for the base sill is non-negotiable, especially near ground contact. The USDA Forest Products Laboratory has a lot of depth on wood moisture and ground-contact durability if you want the science.
In our research, budgets break down simply. A basic 8×10 in plain pine and asphalt shingles runs low. Upgrade to cedar siding and metal roofing and it creeps up to three times that.
Choose your materials before you pick the plan, not the other way around.
Step-by-Step Build Plan: From Permit Check to Finished Shed
Here's the workflow that keeps the project on track. Follow these steps in order, and you won't be rebuilding anything.
- Check permits and zoning with your local building department.
- Level the site and remove grass or topsoil.
- Lay the foundation (gravel pad, piers, or slab).
- Frame the floor with treated joists.
- Build the wall panels flat, then stand them up.
- Set the roof trusses or rafters.
- Sheathe the walls and roof with plywood or OSB.
- Wrap the exterior with building paper, then install doors and windows.
- Put on the roofing material and flashing.
- Add siding, trim, and exterior paint or stain.
| Phase | Typical time | Difficulty |
|---|---|---|
| Site prep and foundation | 1 to 2 days | Easy |
| Framing walls and roof | 1 to 2 days | Moderate |
| Sheathing and doors | 1 day | Moderate |
| Roofing and siding | 1 to 2 days | Moderate |
A 10×12 shed on a gravel pad will take a reasonably handy beginner two full weekends. A larger slab-built shed can stretch to four or six weekends. The biggest time sink isn't hammering nails.
It's waiting on permits and running back to the lumberyard.
Skip the cheap framing nails for anything structural. Use screws for the floor and walls where you can. Framing nailers go faster, but a battery screwdriver gets you better results if you're new.
And always order 10% extra lumber. Warped boards happen, and you won't want to stop mid-wall.
Shed Size Cheat Sheet: Square Footage, Lumber Costs, and Build Time by Dimension
You can save a lot of money by knowing exactly how big to go. Here's how the common dimensions stack up, from smallest to largest.
| Dimension | Square Footage | Lumber Cost Range | Build Time |
|---|---|---|---|
| 6×8 | 48 sq ft | Low | One weekend |
| 8×10 | 80 sq ft | Low to mid | 2 weekends |
| 10×12 | 120 sq ft | Mid | 2 to 3 weekends |
| 12×16 | 192 sq ft | Mid to high | 3 to 4 weekends |
| 12×20 | 240 sq ft | High | 4 to 6 weekends |
Lumber costs shift by region and material type. Pressure-treated framing costs more than standard pine. Local lumberyard quotes run below big-box store prices most of the time.
If you're on a tight budget, the 8×10 is the best compromise. It stores a mower, tools, and a small workbench without wasting money. If you want a real workshop, jump to 12×16 and plan for a wider door.
Build time depends on roof complexity as much as footprint. A simple gable roof on a 10×12 goes faster than a hip roof on a smaller 8×8. Match the roof to your experience, and you'll save entire weekends.
Mistakes That Wreck a DIY Shed Build (And How to Dodge Them)
Skipping the permit call. Building first and asking later gets expensive. A quick local building department call tells you the rules upfront.
Ignoring drainage. A low spot turns a gravel pad into a puddle. Always pick the highest, driest corner of your yard.
Forgetting about the door swing. Your shed door needs full clearance to open. Leave room to walk past a mower, not squeeze past it.
Using untreated lumber for the floor. Ground contact rots standard pine in a few seasons. Pressure-treated lumber is worth every extra cent.
Ordering lumber without a cut list. Wasted lumber is wasted money. Good shed plans give exact quantities, so you buy once.
Starting with a roof that's too complex. Hip roofs and dormers are not beginner projects. A gable roof is forgiving, easier to flash, and still looks great.
Our research shows that most shed failures trace back to foundation and moisture issues, not framing. Fix the base, and the building lasts decades.
FAQ: Quick Answers on Shed Sizes, Plans, and Permits
Do I need a permit to build a garden shed?
Most municipalities require a permit for sheds over a certain size, often 100 to 120 square feet. Smaller sheds may be exempt, but setbacks and easements still apply. Call your local building department before buying materials.
They'll give you the exact rules for your address.
What size shed is best for a backyard?
An 8×10 shed fits most yards and storage needs. It holds a lawn mower, tools, and bikes with room to move. If you want a workshop or ride-on mower, step up to a 10×12 or 12×16.
Always measure your largest items first.
How long does it take to build a shed?
A beginner with a helper can build a basic 8×10 over two weekends. Site prep and foundation take one weekend. Framing, roofing, and siding take the next.
Larger or more complex designs stretch to four or six weekends.
Can I build a shed directly on the ground?
It's not recommended. Ground contact rot will eventually weaken untreated wood. Gravel pads or pier blocks are the cheapest reliable options.
A concrete slab is the most durable choice. Keep pressure-treated lumber between the soil and your framing.
How much does it cost to build a shed yourself?
DIY costs are often half the price of a prefab shed kit. A basic 8×10 in pine with asphalt shingles sits at the lower end. Cedar siding and metal roofing push it higher.
Your location and material choices drive the final number.

Similar Posts