Soil Moisture Meters: Do They Actually Work?
Botanical Horticulturist & Food Preservation Specialist at Brittle Bloom · Certified Master Gardener & Master Food Preserver · 12+ Years in Plant Propagation & Food Preservation
You bought a soil moisture meter to stop killing your plants, and now you're staring at a needle that seems to lie half the time. The short answer: yes, they actually work, but only when you use them the right way. Below I'll show you exactly why they fail, how to fix that, and the simple trick that makes any meter worth its weight.
So, Do Soil Moisture Meters Actually Work?
Yeah, but with a big asterisk. A soil moisture meter measures electrical resistance between two metal probes. Wet soil conducts electricity easily, dry soil barely conducts at all.
That's the entire science in one sentence. The problem? Most people jam the probe in, read the dial, and water based on a number they don't understand.
Then they blame the tool when their plant still dies. The truth is, the meter works fine. The technique is usually the problem.
Here's the catch: the meter only reads the soil right around the probe tip. If you poke it near the top of the pot, you're measuring the top inch of soil, not the root zone where it actually matters. That single mistake causes more "broken" meters than any manufacturing defect ever did.
How Soil Moisture Meters Work

Image source: Wikimedia Commons / NASA
Inside that plastic body are two metal rods, usually copper and steel. When you push them into damp soil, a tiny electrical current flows between them. The wetter the soil, the stronger the current.
The meter's needle or digital screen translates that current into a reading on a scale of 1 to 10.
It's the same principle behind a basic electrical conductivity test. University extension researchers have studied this for decades, the University of Minnesota Extension has a whole library on watering houseplants and container gardens, and they all point to the same physics: moisture meters measure conductivity, not "water content" directly.
Now, you might be wondering why the readings feel so inconsistent. That brings us to the biggest mistake people make: treating the meter like a thermometer instead of a probe. A thermometer reads the air around it instantly.
A moisture meter reads a tiny pocket of soil, and only after it's had time to settle.
Most cheap analog meters need 30 to 60 seconds to stabilize. If you stick it in, read it, and pull it out in five seconds, you're not getting a reading. You're getting a guess.
Here's another thing nobody mentions: most analog meters have a probe between 4 and 8 inches long, with a handle about the size of a thick marker. The needle sits behind a plastic window that scratches easily, and the dial markings are printed on paper, so keep it out of direct sunlight or the numbers fade. Digital versions add a small LCD screen and a button or two, and they typically run on a single coin battery.

Image source: Wikimedia Commons / NASA
Types of Soil Moisture Meters
Image source: Wikimedia Commons / Deni Williams from São Paulo, Brasil / Brazil (CC BY)
There are three main styles, and they're not created equal.
Analog meters are the classic $10, $15 tools with a dial and a needle. No battery, no screen, no fuss. The downside: the needle can be jumpy, and the scale is vague.
A "4" on one brand might mean "water me" while a "4" on another brand means "soak me."
Digital meters replace the dial with an LCD screen and often add extra sensors for pH, light, and moisture. They're easier to read, but they eat batteries, and the extra features are usually cheap novelties rather than lab-grade instruments.
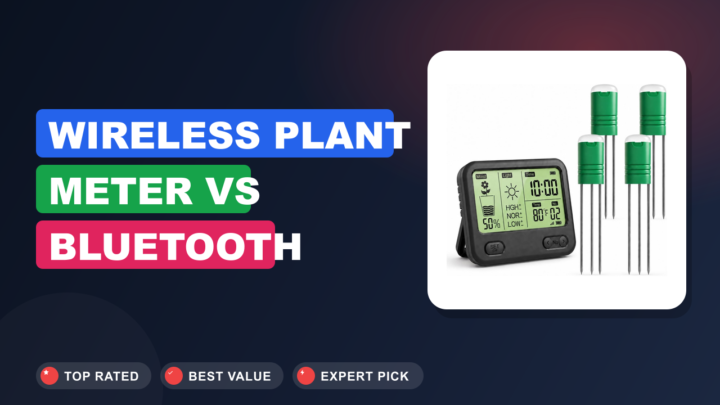
Wireless and Bluetooth meters are the new wave. They sit in the pot permanently and push readings to your phone. Fancy?
Sure. Reliable? Sometimes.
If you're torn between a smart meter and a classic probe, we've compared the two head-to-head, the short version is that smart meters win on convenience but lose on battery life and cost.
Then there's the no-tech option: self-watering indicators like the SUStee Aquameter. No dial, no battery, no probe, just a little window that changes color when the soil dries out. We've put passive monitors side-by-side to see which one actually saves plants, and the results surprised me.
Why Soil Moisture Meters Fail
Let's be brutally honest. A $12 meter from the garden center is not a precision instrument. It's a toy with a needle.
But here's what nobody tells you: most failures are user error, not hardware failure.
Picture this: you're standing over a droopy peace lily, meter in hand. You poke the probe into the top inch of soil, it reads 3, so you water. Three days later, the plant is still droopy.
Sound familiar? The top inch was dry, but the root ball was swimming.
Mistake #1: You're not pushing deep enough. Most houseplant roots live in the bottom two-thirds of the pot. If your probe is only 4 inches long and you're only pushing it in 2 inches, you're measuring the dry crust while the root zone is still soaked.
Mistake #2: You're reading too fast. Analog meters need time to settle. Give it a full minute.
Mistake #3: You're testing in the same spot every time. Soil dries unevenly. The side near a sunny window dries faster than the shaded side. Test at least two spots per pot.
Mistake #4: Your fertilizer is lying to you. Here's a nasty one: dissolved salts from fertilizer conduct electricity. A pot that's bone dry but full of salt buildup can read as "moist." That's why so many people overwater in winter, the meter says wet, so they skip watering, but the soil is actually dust.
Mistake #5: The probes are corroded. Cheap meters use dissimilar metals that corrode over time. Once that green crust forms, the readings drift. This is exactly why some people swear by self-watering indicators instead, there's nothing to corrode and nothing to misread.
How to Use a Soil Moisture Meter Correctly
Image source: Wikimedia Commons / Shixart1985 (CC BY)
Here's the fix. Follow these steps and your meter will suddenly start working again.
- Push the probe down to root depth. For most houseplants, that's 3 to 5 inches. For outdoor plants, go 6 to 8 inches. The probe tip is the sensor, it needs to sit where the roots are.
- Wait 60 seconds. Set a timer if you have to. Analog meters drift upward as the soil moisture wicks onto the probe. A reading at 5 seconds is worthless.
- Read the scale correctly. Most meters use 1, 10, with 1 being bone dry and 10 being a swamp. Water when the needle hits 2 or 3 for most houseplants. Cacti and succulents? Wait until it hits 1.
- Test in two or three spots. Move around the pot, especially if it's a large container. One dry spot next to a wet spot tells you the soil is uneven, not that the meter is broken.
- Clean the probes after every use. Wipe them with a dry cloth. If you see corrosion, gently scrub with fine sandpaper. This alone extends the life of a cheap meter by years.
The best part? This routine takes about two minutes per plant. Once you get the hang of it, you'll trust the meter more than your finger, and your plants will look like it.
The Best Soil Moisture Meters (and Who Should Skip Them)
Let's talk about which ones are actually worth buying.
Cheap analog meters ($8, $15): Great for beginners, terrible for perfectionists. The needle is imprecise, the scale varies by brand, and the probes corrode within a season or two. Real owners complain about readings that jump around when you wiggle the probe, and the "moisture only" versions are useless for outdoor garden beds because the probe is too short.
Pick one up and you'll notice it feels hollow and light, under 4 ounces, while the better analog meters have a solid, slightly weighted handle that makes it easier to push into compacted soil. Who should skip this: anyone with a large outdoor garden or a collection of picky plants like calatheas and ferns.
Digital 4-in-1 meters ($15, $30): The pH and light sensors are usually gimmicks. The moisture reading is decent, but the pH reading drifts badly and needs constant calibration. Owners complain that the light sensor has to be angled perfectly to give a consistent number, and the batteries die at the worst possible moment. Who should skip this: anyone who only needs moisture readings and doesn't want to babysit a battery-powered gadget.
Wireless smart meters ($40, $80): The convenience is real, you open an app and see the trend over time. But the sensors dry out and need re-wetting, the batteries are proprietary, and the app can lose connection mid-update. Owners complain about subscription fees for "premium" features that used to be free. Who should skip this: anyone who doesn't want another app on their phone or another device to charge.
Passive indicators like the SUStee Aquameter ($10, $20 for a pack): These are the dark horse. No battery, no dial, no corrosion. They sit in the pot and change color when the soil dries.
The downside: they only tell you "wet or dry," not "how wet," and they can be slow to change color in cool rooms. For a detailed look at which style wins for your specific plants, our wireless versus classic comparison breaks it all down.
When You Shouldn't Trust the Reading
Even a perfectly used meter will lie to you in certain situations.
Sandy soil: Water drains through sand so fast that the probe barely registers conductivity. A sandy mix can read "dry" when there's still plenty of moisture.
Fertilizer-heavy soil: As I mentioned, salts conduct electricity. A pot that's crusted with fertilizer salts will read artificially wet. Flush the soil with plain water and test again.
Frozen soil: Ice doesn't conduct electricity like liquid water does. A frozen pot reads as bone dry even when it's saturated with ice crystals.
Tiny pots: If your pot is smaller than the probe length, the probe pokes out the drainage hole or reads the air gap at the bottom. Use a shorter probe or a passive indicator instead.
Very compacted soil: If the soil is so hard you have to force the probe in, you're not getting good contact between the metal and the soil particles. The reading will be erratic.
On the flip side, there's one place moisture meters shine: consistency. Even NASA tracks soil moisture from orbit with its SMAP satellite, because the same physics apply whether you're measuring a window box or the whole Great Plains. The NASA soil moisture data helps farmers decide when to irrigate, using the exact same electrical conductivity principle your $15 meter uses.
Quick Answers to Common Questions
Can I leave the probe in the soil permanently?
No. Leaving a metal probe buried in wet soil speeds up corrosion and messes up future readings. Insert it, wait, read, and pull it out.
Clean it after each use.
Why does my meter read differently in the same pot?
Because soil moisture is not uniform. The side near a window dries faster. The bottom stays wet longer.
That's why testing two or three spots matters more than chasing a single perfect number.
What number should I water at?
For most houseplants, water when the needle drops to 2 or 3. For succulents and cacti, wait until it hits 1. If your meter uses a different scale, check the manual, but the principle is the same: water when it's dry at root depth, not when the top looks dry.
The Bottom Line
So do soil moisture meters actually work? Yes, when you use them right, and no, when you don't.
The meter is not a magic wand. It's a tool that measures a tiny pocket of soil around its probe tip. Push it to root depth, wait a full minute, test multiple spots, and clean the probes.
Do that, and even a $10 meter will save you from overwatering more times than you can count.
Skip the cheap 4-in-1 gimmicks if you only need moisture. Get a simple analog meter or a passive indicator, learn how to read it, and trust the process. If you want to understand how smart meters behave differently in real pots, we've dug into how smart meters behave differently, and the answer might surprise you.
Your plants don't need a $200 gadget. They need someone who checks the soil at the root zone, waits a minute, and waters when the soil is actually dry. That's you.
And now you know how.

Similar Posts