Can You Freeze Dry Without a Freeze Dryer?
Botanical Horticulturist & Food Preservation Specialist at Brittle Bloom · Certified Master Gardener & Master Food Preserver · 12+ Years in Plant Propagation & Food Preservation
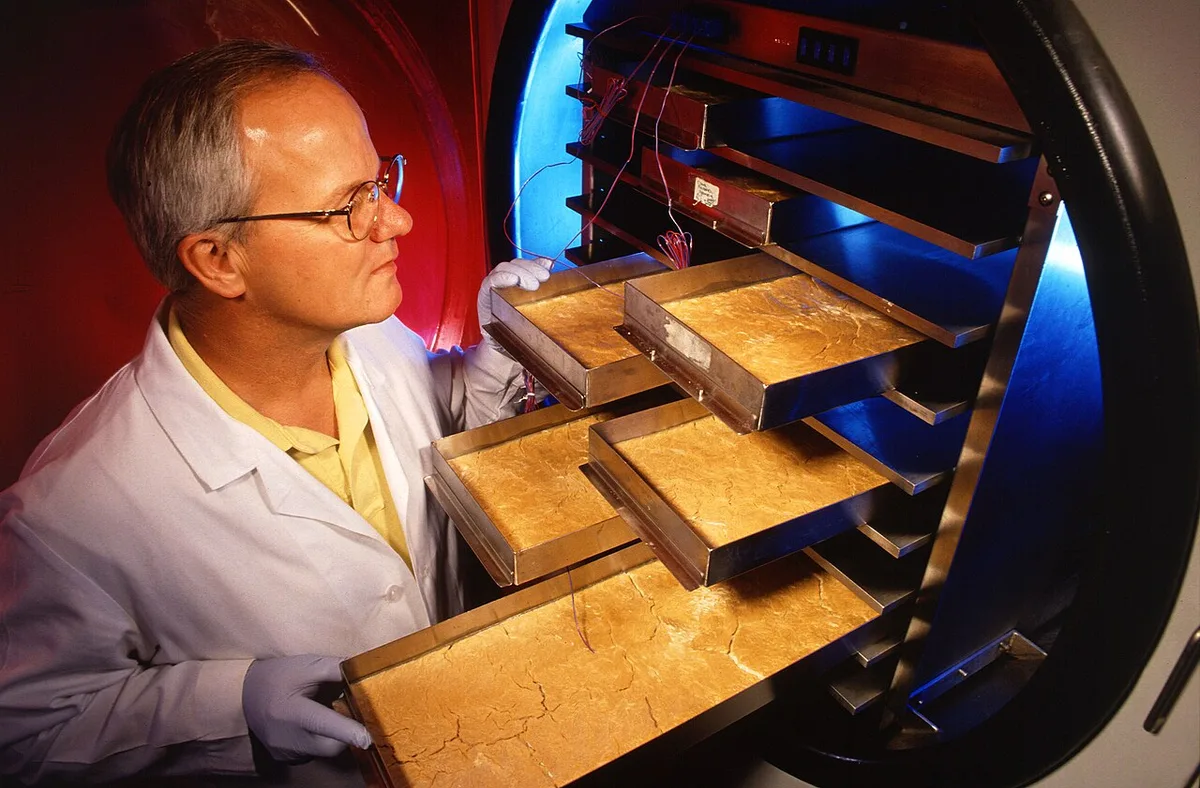
Can you freeze dry without a freeze dryer? It's a fair question, especially when a home freeze dryer costs anywhere from $2,000 to $4,000 as of 2026. The short answer is yes, you can approximate the process at home, but the results aren't the same as machine freeze drying.
The secret is understanding what freeze drying actually does. It removes moisture through sublimation, turning ice directly into vapor without melting. Per USDA food preservation guidelines, that's why freeze-dried food at under 10% moisture can last decades.
Your freezer alone can't pull this off, but dry ice and a vacuum chamber can get surprisingly close. Let's walk through the options so you know what's worth your time.
The Real Question: Is "Cheating" Freeze Drying Even Possible?
Real freeze drying, or lyophilization, happens in three controlled stages. First, food gets frozen solid. Second, a vacuum lowers pressure to force ice to sublimate.
Third, slow heat draws out remaining moisture without melting the structure.
Every DIY workaround is a simplified version of this process. Some nail the freezing part but miss the vacuum. Others get sublimation right but struggle with texture.
The honest reality is that homemade batches will never fully match a commercial machine's shelf life or quality. But that doesn't mean they're useless.
If you just want crispy apple slices for next month's hiking trip, a freezer or dry-ice setup works fine. If you're planning a 25-year emergency pantry, you need the real machine. That's the core decision tree: match your method to your storage goals.
Quick Answer
Can you freeze dry without a freeze dryer? Yes, but not truly. A regular deep freezer is too warm to sublimate properly.
Dry ice and a vacuum chamber work better. Results differ in texture and shelf life. DIY methods are best for short-term storage.
Real freeze dryers remain the best for long-term preservation.
How Freeze Drying Really Works (and Why Your Freezer Isn't Enough)
Sublimation is the heart of freeze drying. It's when ice skips the liquid stage and turns straight into vapor. For this to happen, food must stay frozen while water molecules escape.
The problem is your freezer can't create the right conditions for this.
Image source: Wikimedia Commons / Pablo Carlos Budassi (CC BY-SA)
Most home freezers sit between 0°F and -10°F (-18°C to -23°C). That's cold enough to freeze food but not cold enough to drive efficient sublimation. Water vapor needs a pressure and temperature imbalance to escape.
Freezers lack the vacuum component, so ice slowly sublimates on its own, contaminating the food with frost. That's why food in a regular freezer develops freezer burn instead of drying out.
Manufacturer specifications show true freeze dryers operate at extremely low pressures. Commercial units work around 0.05 to 0.1 mTorr. Home units like Harvest Right manage similar environments.
Without that vacuum, your freezer is just cold storage, not dehydration equipment.
If you are trying to dry food in a regular freezer, you can follow the broader approach to cold storage drying for context. It can work for small, thin items like herbs, but expect weeks of waiting and mediocre texture.
The Three DIY Routes: Regular Freezer, Dry Ice, and Vacuum Chamber
There are three practical ways to mimic freeze drying at home. Each has different equipment requirements, timelines, and results.
| Method | Equipment You Already Own? | Time to Finish | Shelf Life Result |
|---|---|---|---|
| Regular deep freezer | Yes | 2–4 weeks | Weeks to months, not years |
| Dry ice + cooler | No — need dry ice | 24–72 hours | Months, closer to real freeze-dried |
| Vacuum chamber + pump | No — need chamber and pump | 2–5 days | Months, best texture of the three |
The Regular Freezer Method
This is the simplest route. You place food on trays in a deep freezer and wait. Ice sublimates slowly over weeks, leaving food dry but shriveled.
The texture resembles leather, not the porous crisp of machine freeze-dried food. It works best for thin-cut fruits or herbs.
Who's it for? People with zero budget and plenty of patience. If you're just testing whether freeze-dried snacks suit you, this method costs nothing.
The Dry Ice Method
Dry ice sits at -109°F (-78.5°C), far colder than any freezer. When placed near food in an insulated cooler, it forces ice crystals to sublimate quickly. The process takes one to three days instead of weeks.
Texture comes out closer to true freeze-dried, and nutrients stay better preserved.
Who's it for? Campers, backpackers, and preppers who need lightweight meals without investing in a machine.
The Vacuum Chamber Method
A vacuum chamber and pump pull oxygen out of a sealed container, lowering pressure and driving sublimation. This method pairs with a pre-frozen food batch. Results resemble commercial freeze-drying more than any other DIY route.
Who's it for? Experimenters and gadget owners. The chamber setup costs less than a freeze dryer but demands attention to safety.
You'll want to compare freeze-drying versus dehydrating before committing to this route.
How to Freeze Dry Without a Machine: The Dry Ice Method, Step by Step
The dry ice method gives you the best bang for your buck. It's faster than a freezer and cheaper than a vacuum chamber. Here's how to pull it off safely and effectively.
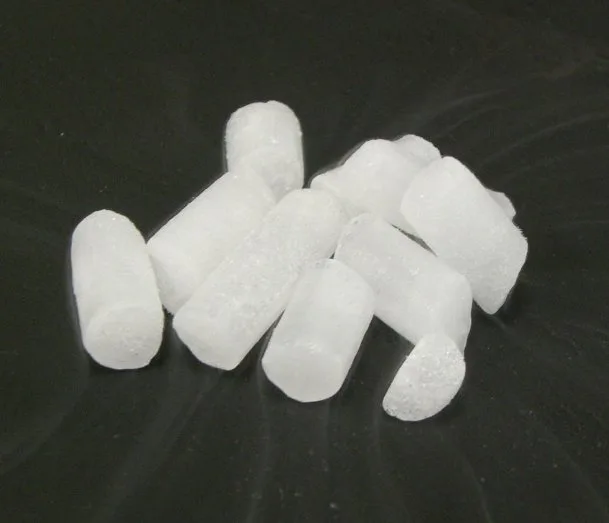
Image source: Wikimedia Commons / Richard Wheeler (Zephyris) at en.wikipedia (CC BY-SA)
What You'll Need
- Food to freeze dry (thin slices work best)
- Dry ice, roughly 5, 10 pounds per batch
- A large insulated cooler
- Parchment paper or silicone baking mats
- Heavy-duty gloves or tongs
- A thermometer to monitor temperature
The Step-by-Step Process
- Prep your food. Wash, peel, and slice everything into thin, uniform pieces. Smaller pieces dry faster and more evenly.
- Pre-freeze on trays. Lay slices on parchment-lined baking sheets and freeze solid. This prevents them from clumping together later.
- Line your cooler. Place dry ice at the bottom of the cooler, then add a layer of parchment or foil to protect food.
- Arrange the food. Spread pre-frozen pieces in a single layer on top of the dry ice barrier. Don't overcrowd the cooler.
- Seal and wait. Close the lid and leave it in a well-ventilated area. Refresh dry ice every 24 to 48 hours.
- Check for dryness. Food is done when it's brittle to the touch and crumbles when crushed. You can also check how freeze-dried garlic behaves as a reference.
How to Test If It's Actually Dry
Moisture left behind means spoilage later. A simple crush test helps. Take a frozen-dry piece and press it between fingers.
If it cracks cleanly, it's dry. If it bends or feels rubbery, it needs more time. Freeze-dried fruit should feel brittle and brittle, similar to cereal.
Common Mistakes and Safety Warnings: What to Never Try
Mistakes in DIY freeze drying can waste food or invite foodborne illness. Knowing what to avoid is just as important as following the steps.
- Don't seal dry ice in airtight containers. Dry ice sublimates into carbon dioxide gas. Sealed jars can explode from pressure buildup. Keep coolers only slightly sealed.
- Never handle dry ice barehanded. It causes severe frostbite on contact. Always use heavy gloves or tongs.
- Avoid doing this in small, enclosed spaces. Carbon dioxide displaces oxygen. Work outdoors or in a room with open windows.
- Don't skip the pre-freezing step. Food placed directly on dry ice freezes unevenly, leaving moisture pockets inside.
- Never assume freezer-made food is shelf-stable. Without a vacuum cycle, moisture can remain trapped. Store homemade results in the fridge or freezer unless you've confirmed full dryness.
- Watch out for high-air humidity. Humid climates slow sublimation and increase frost buildup. Dry ice methods work best in cooler, drier conditions.
If you're working with specific foods like honey or bacon, you'll need additional precautions. High-sugar and high-fat items behave differently under sublimation. That's where a real machine or careful research matters most.
Another mistake is underestimating equipment needs. A tiny household deep freezer is not the same as industrial cold storage. Per National Center for Home Food Preservation guidance, proper freeze drying requires controlled temperature and pressure.
Without both, you're just dehydrating very slowly.
Also, never place food directly on dry ice. The extreme cold flash-freezes the surface while the center stays wet. That causes uneven drying and shorter storage life.
Dispose of dry ice in an open, ventilated space. Don't rinse it down the sink or toss it in a sealed trash bag. The cold can crack plumbing, and expanding gas can burst the bag.
If your setup thaws mid-cycle, don't try to save it. Partially dried food holds moisture and breeds bacteria quickly. Start over with fresh ingredients.
FAQs About Freeze Drying Without a Machine
How Long Does Freeze Drying Without a Machine Take?
With dry ice, expect 24 to 72 hours. A regular freezer needs two to four weeks. Thin slices dry faster than thick chunks.
Timing depends on moisture levels and how often you refresh the dry ice.
Can You Freeze Dry in a Regular Freezer?
Yes, but it's not true freeze drying. Your freezer lacks vacuum pressure, so sublimation happens slowly and unevenly. Food turns leathery instead of crisp and won't keep for years.
It is still a fun low-cost experiment.
Is Dry Ice Safe for Food Freeze Drying?
Yes, when handled properly. Dry ice is food-grade and works as a cold source. Use gloves and keep food separated with a barrier.
Never place food directly on dry ice. Also avoid inhaling the gas in enclosed spaces.
What Foods Can You Freeze Dry Without a Machine?
Low-fat fruits, vegetables, and even eggs work well. High-fat items like cheese or chocolate dry poorly. High-sugar foods like honey turn sticky.
Thin, low-moisture ingredients give the best results in DIY setups.
How Do You Know When Freeze-Dried Food Is Fully Dry?
Check whether it snaps or crumbles when pressed. Bending or rubbery texture means moisture remains. A sharp crunch sound is a good sign.
If you're unsure, give it more time in the dry ice setup.
Should You Save Up for a Real Freeze Dryer?
Only if you want long-term storage or true crisp texture. Real units cost $2,000 to $4,000 as of 2026. DIY methods are cheaper but never match that shelf life or quality.
Final Verdict: Which Method Is Actually Worth Your Time?
Here's the honest breakdown. Use a regular freezer if you have zero budget and are just experimenting. Use dry ice for quick weekend batches of fruit snacks or camping meals.
Use a vacuum chamber if you already own one and want the best texture without buying a machine.
For long-term food storage, none of these replace a real freeze dryer. Per the National Center for Home Food Preservation, proper lyophilization needs controlled vacuum and temperature. DIY methods leave too much residual moisture for years-long storage.
If you're already shopping for a used unit, check the pump hours before committing. The pump is the heart of any freeze dryer, and worn pumps cost real money to replace.
The smartest move is to start small. Try the dry ice method, test your favorite fruits, and see if freeze-dried food actually fits your lifestyle. That's a low-risk way to decide whether a $3,000 machine makes sense.

Similar Posts