Garden-to-Table Thanksgiving Centerpiece Ideas
Botanical Horticulturist & Food Preservation Specialist at Brittle Bloom · Certified Master Gardener & Master Food Preserver · 12+ Years in Plant Propagation & Food Preservation
Thanksgiving is creeping up, and if you’re looking for thanksgiving centerpiece ideas using things from your garden, you’re already ahead of the game. Store-bought decor is fine, but the stuff growing right outside your door has more personality, more texture, and honestly, more story to tell.
As of 2026, the zero-waste holiday trend is only getting stronger. Research from the University of Minnesota Extension and other cooperative extension programs confirms that most autumn gardens still hold plenty of material for table decor, even after frost. You just need to know what to look for and how to keep it alive through dinner.
Quick Answer
You can make thanksgiving centerpiece ideas using things from your garden. Start with pumpkins, squash, gourds, and dried stems. Arrange them low on a tray or in a hollowed pumpkin.
Evergreens and herbs add color and scent. It’s free, compostable, and lasts for days.
Why Gather From Your Garden? The Visual Payoff Is Real
There’s something about a centerpiece made from your own garden that store-bought decor can’t fake. It has a looser, more relaxed feel, like the table is part of the season instead of just dressed up for it. But here’s the honest part.
Foraging your own material only looks good if you understand the difference between “gathered” and “messy.”
The secret is structure. A wild arrangement still needs a shape, a focal point, and some breathing room. When you get that right, guests notice.
When you skip it, the table looks cluttered.
Cost matters too. In our research, a fully foraged centerpiece runs anywhere from zero to ten dollars. That’s assuming you have access to a few basic tools like pruners and floral tape.
Compare that to a store-bought arrangement that can easily hit fifty dollars and you see the appeal.
Seasonality is the other big factor. By late November in northern zones, your flower beds are long done. But the garden isn’t empty.
Evergreen branches, dried seed heads, winter squash, and ornamental grasses are all still out there, waiting. They also happen to be exactly what a robust fall centerpiece needs.
What to Grab: Your Garden Tour for Centerpiece Supplies
Think of this as a quick walk around your yard with a bucket and a pair of pruners. You’re looking for four main categories, and each one plays a specific role in the arrangement.
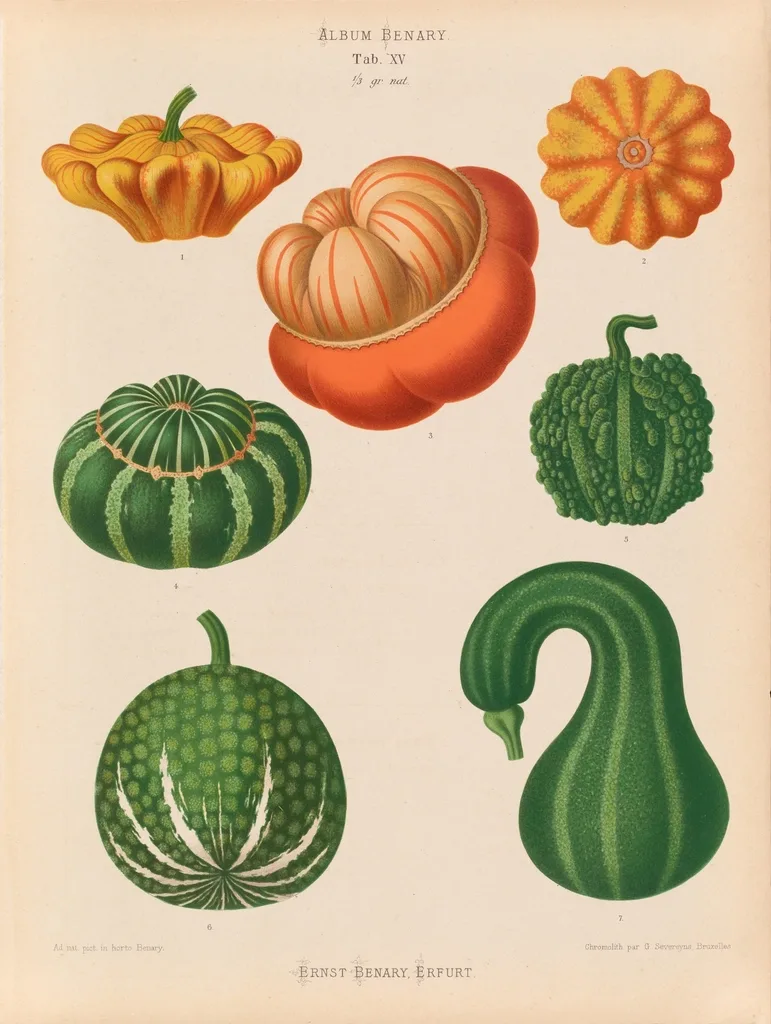
Image source: Openverse / bhl
Pumpkins, Squash, and Gourds
These are your anchors. Mini pumpkins and warty gourds bring texture and a bit of whimsy. Acorn, butternut, and delicata squash are more elegant and hold up well indoors.
If the rind is firm and unbruised, they can last two to three weeks on a table. A soft spot is the first sign of rot, so check them before you bring them inside.
Dried Stems and Seed Heads
Late-season flowers that have gone to seed are some of your best assets. Strawflower, statice, celosia, and yarrow keep their color for months after drying. Seed pods from okra, lotus, or even poppy add interesting architecture.
Grasses like switchgrass or feather grass give movement and softness.
Evergreens, Herbs, and Berries
Pine, fir, juniper, and cedar branches bring scent and deep green color. Rosemary, sage, and thyme work double duty, they look great and they smell like Thanksgiving dinner. For small pops of red, rose hips, winterberry, and viburnum berries are excellent.
Just be sure to check that any berry you pick is safe for kids and pets.
What to Skip
Avoid invasive plants like oriental bittersweet, which can spread if the seeds drop. Stay away from yew berries, pokeweed, and ivy berries entirely. They’re toxic, and no centerpiece is worth a sick guest.
Build It in 5 Simple Steps: Visual Cues for a Balanced Arrangement
You don’t need formal floristry training to make this look good. You just need a few steps and an eye for balance. If a diagram showed this process, it would look like a simple pyramid shape: tall in the center, low at the edges, with everything touching something else.
Step 1: Cut, Condition, and Clean
Cut stems at an angle and place them in water for a few hours before you start. This hydrates the branches and makes them less likely to wilt during dinner. Shake out any bugs or spiders, and rinse your produce to remove dirt.
Nothing kills a beautiful arrangement faster than a stink bug crawling across the tablecloth.
Step 2: Pick Your Container and Mechanics
A hollowed-out pumpkin makes a natural vase. Just add a liner cup or a glass jar inside to hold water. A cake stand, a wooden bowl, or even a rustic tray works too.
For mechanics, you have a few choices. Floral foam is simple but not eco-friendly. Chicken wire scrunched into a ball works great.
A floral frog is reusable and easy to hide under greens.
Step 3: Lay the Green Base
Start with your evergreen branches or large kale leaves. These set the footprint of the arrangement. Lay them horizontally around the edges, pointing outward.
You want a solid base that covers the mechanics and gives the eye a place to rest.
Step 4: Build Height with Focal Pieces
Add your tallest stems next, like branches with berries or seed heads. Then place your pumpkins and squash. The biggest or most colorful piece goes near the center, not dead center, but slightly off for a more natural feel.
Small gourds cluster around it like they grew there.
Step 5: Fill Gaps, Set Candles, and Step Back
Tuck herbs into empty spaces. Add small berries or acorns anywhere it looks thin. Set candles at a height that won’t block eye contact.
Then step back and look. If something feels off, it’s usually because one element is too dominant. Remove one thing and reassess.
Low, Tall, or Edible: Pick the Shape That Fits Your Table
The shape of your centerpiece depends on one thing, what you’re doing around the table. If guests are seated and having a conversation, a tall centerpiece ruins the whole dynamic. If you’re serving buffet-style, a low piece gets lost on a long sideboard.
Here’s a quick breakdown of your three best options:
| Style | Best For | Key Tips |
|---|---|---|
| Low and lush | Dining tables with seated guests | Keep under 12 inches tall. Use squash, kale, and short herbs. |
| Tall and dramatic | Buffets, sideboards, or entry tables | Use tall branches, seed heads, and candles. Keep narrow. |
| Edible and fragrant | Guests who love a conversation starter | Use apples, pears, pomegranates, and herbs. Serve them after. |
Choose low if you want easy conversation and eye contact. It’s the safest pick for a standard Thanksgiving dinner. Use a base of evergreen branches, then nestle squash and gourds directly on the table.
Add small votive candles and you’re done.
Choose tall if the table is against a wall or serving food. The height draws the eye upward and clears the food line. Just keep it narrow so it doesn’t block serving dishes or bottle necks.
Choose edible if you want a centerpiece that earns its keep. A bowl of apples, pears, and pomegranates with rosemary sprigs tucked between them looks stunning. After dinner, wash everything and put it in a pie.
That’s the kind of zero-waste move that makes you look like a genius.
5 Visual Mistakes That Scream “I Just Threw Stuff Together”
Everything Same Size, Same Height
If every pumpkin, gourd, and candle is roughly the same height, the arrangement goes flat. There’s no rhythm for the eye to follow. Visual hierarchy matters.
One big piece, a few medium pieces, and several small pieces create the layering that makes a centerpiece feel designed.
Too Many Colors Fighting Each Other
A garden is full of colors, and grabbing one of everything turns out chaotic. Pick three colors at most. Burnt orange, deep green, and cream is a classic fall combo that always works.
Red berries can replace orange if you’re using pomegranates and winterberry. Whatever you choose, let one color lead.
Wilted or Rotting Material You Didn’t Condition
Fresh-cut greens need water, not just prime placement. Skip the conditioning step and you’ll have sad, drooping branches by the time dessert rolls around. The same issue happens with squash.
A soft spot on a pumpkin means rot is coming. Check every piece daily and pull anything that starts to fail before it ruins the display.
Candle Chaos
Candles that are too tall block faces. Candles tucked too close to dried leaves and seed heads are a fire hazard. Keep flames at least four inches away from anything flammable.
Also, taper candles look best when they’re slightly different heights. Matching everything exactly reads as stiff instead of intentional.
Forgetting Negative Space
A centerpiece should not look like a hedge. Empty space lets each element breathe. If you fill every gap with a berry or a twig, the arrangement becomes visual noise.
Step back after you place each item. If two elements are touching, that’s fine. If everything is touching, it’s time to remove one.
Keeping It Fresh Through Dinner and Rot-Free the Next Day
How do you keep fresh-cut greens alive through a long meal?
Water is the answer. Re-cut every stem at an angle and place it in water as soon as you gather it. Then give the arrangement a light mist about an hour before guests arrive.
Fresh-cut evergreen branches hold up for three to five days if the water is topped off daily. Herbs like rosemary and sage last about the same. Just add a few ice cubes to the container if your home runs warm.
What's the best way to check pumpkins and gourds for rot?
Squeeze them gently every morning. If any spot feels soft or spongy, remove that piece immediately. Rot spreads fast between touching gourds, and one bad pumpkin can ruin your whole arrangement by dinner.
For long-term displays, some gardeners cure their pumpkins first. Wipe them with a diluted bleach solution and let them dry completely. This thins the skin and extends their shelf life by a week or two.
Can dried arrangements be reused next year?
Yes, with proper care. Dried flowers, seed heads, and branches can be stored in a cardboard box with tissue paper. Keep them in a cool, dry space away from sunlight.
They can easily last through the next season.
Some dried pieces are too fragile for a second run. Grasses and okra pods snap easily, so handle them with care when packing away.
How do you compost the whole setup when it's over?
Most garden material breaks down fast. Pumpkins and squash are almost entirely water. Evergreens and herbs are carbon-rich leaves and stems.
Just remove any floral foam, wire, or candle wax before tossing it in the bin.
If you used ribbon or artificial berries, pick those out too. The compost pile can handle everything else.
Thanksgiving Centerpiece FAQs
How early can I assemble everything before guests arrive?
Assemble up to 48 hours ahead. Fresh greens hold well if conditioned in water first. Place the finished arrangement in a cool room overnight.
Add candles and any delicate berries on the day of the meal.
Can I make this work with just herbs and a potted shrub?
Absolutely. Rosemary, sage, thyme, and oregano cluster beautifully in a low dish. Cut sprigs from a potted juniper or boxwood for greenery.
Add a few apples or a small squash for visual weight.
What if I don't have pumpkins?
Use what you have. Butternut squash, acorn squash, and even cabbage heads make excellent anchors. Apples, pears, and pomegranates cluster just as well.
Nuts and acorns add texture.
How do I keep bugs from hitching a ride inside?
Shake branches vigorously before bringing them in. Rinse produce and let it dry. Check seed heads and dried flowers for spiders or eggs.
Leaving cut material in the garage overnight in a sealed bin helps too.
Is it safe to put candles near dried leaves and grasses?
Keep flames at least four inches away from anything dry. Use glass candle holders and never leave them burning unattended. Trim any overhanging greenery or seed heads that extend over the flame.

Similar Posts